Butterfly Art Supply Holder
- Opeyemi Richardson-Ovbiebo
- Sep 12, 2020
- 2 min read

It is important as creatives to be very organized. We don't want to use crayons today and next time we need it we start looking for it. Keeping our materials in place well arranged is the best and also helps stimulate our interest in creating the more.
So, we are creating a butterfly art kits holder. This holder can carry your wax crayons, pencils, rulers, scissors etc.

Lets create
You can download the TEMPLATE
Materials:
Thick card base (strawboard or carton)
Butterfly template
Crayons
Scissors
Glue
Strips of black card antennas
Wiggly eyes (tiny black circle and bigger white circle cut from card can be used instead)
STEPS:
STEP 1: Print out your template or map it out on a card following the measurement of the
template and cut out (cut the holder out through the gapped lines if you are using the printout)
Also, punch the 2 holes in case you would love to hang your holder.
STEP 2: Color the butterflies

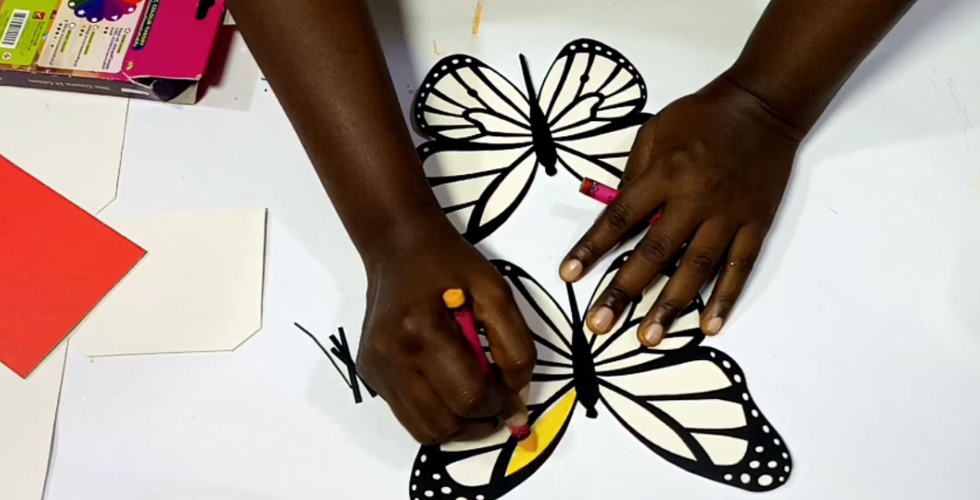


STEP 3: Apply glue at the back head part of the butterfly

STEP 4: Cut tiny strips of black card and roll one end to use for the antenna

STEP 5: Glue to the butterfly

STEP 6: Glue the wiggly eyes for the eyes to make it look more interesting or cut a tiny circle from a black card and a slightly bigger circle from a white card. Then glue the tiny black on the bigger white to create the eyes if you do not have wiggly eyes.

STEP 7: Crease the lines on the template of the holder and fold (creasing can be done using cover of a pen, a broken pencil, a fork or any dull pointed object)

STEP 8: Apply glue on the flaps, allow to dry a bit then glue together and glue the holder to the base.


STEP 9: It's time to glue the butterflies. Check the spots to glue the butterflies to, mark on the back of the butterflies and apply the glue.
STEP 10: Glue the butterflies to the holder on the front and back and leave to dry

STEP 11: Design the left and right space with elements that has to do with a butterfly e.g. flowers.


Comments